About Luxe 3D

This author has not yet filled in any details.
So far Luxe 3D has created 120 blog entries.

Can You Work Within My Budget?

Can You Work Within My Budget?

At Luxe3D, we recognize that budget constraints are a common concern for clients seeking high-quality 3D design services. Whether you’re an architect, product designer, or marketing professional, we understand the need to balance your vision with financial realities. Here’s how Luxe3D can work within your budget while still delivering exceptional results.

Understanding Your Needs and Budget

The first step in our process is to understand your specific needs, project goals, and budget limitations. During our initial consultation, we take the time to discuss the following:

  • Project Scope: Clearly defining what you want to achieve helps us assess the necessary resources and time.
  • Priorities: Knowing what elements are most important to you allows us to focus our efforts on what matters most, ensuring that your budget is allocated effectively.
  • Flexibility: We work with clients to explore flexible options, whether that means adjusting the project scope or timeline.

By establishing clear communication from the start, we can create a plan that aligns with your budget while still meeting your design objectives.

Tailored Solutions for Every Budget

At Luxe3D, we pride ourselves on offering a variety of 3D design services that can be tailored to fit different budget levels. Here are some ways we can accommodate your financial needs:

  1. Scalable Services: Our range of services—from quick 3D renderings to full-scale architectural visualizations—allows us to adapt to your budget. For example, if you require a single room rendering rather than an entire property, we can adjust the project scope accordingly.
  2. Phased Approach: If your budget is limited, we can implement a phased approach to your project. This involves breaking the project into manageable segments, allowing you to spread costs over time while still progressing towards your overall goal.
  3. Prioritized Features: We can help you identify which features of your project are essential and which can be scaled back without losing the overall impact. For example, if certain details can be simplified without compromising quality, this can significantly reduce costs.
  4. Alternative Visual Formats: Depending on your needs, we can offer different types of visualizations. For instance, a basic 3D rendering may suffice for initial presentations, while more detailed, high-resolution images can be created for marketing purposes later on.

Quality Without Compromise

While working within budget constraints is essential, we believe that quality should never be sacrificed. At Luxe3D, we maintain a high standard of work across all projects, regardless of budget. Here’s how we achieve this:

  • Experienced Team: Our team of skilled designers and animators brings years of experience to every project. Their expertise allows us to deliver high-quality results efficiently, ensuring you get the most value for your investment.
  • Cutting-Edge Technology: We utilize the latest 3D rendering software and tools, which streamline our workflow and enhance the quality of our outputs. This not only improves efficiency but also keeps costs manageable.
  • Client-Centric Approach: We view each project as a partnership. Your input and feedback are crucial at every stage, ensuring the final product meets your expectations without exceeding your budget.

Transparent Pricing

At Luxe3D, we believe in transparency regarding pricing. We provide detailed estimates upfront, breaking down the costs associated with different services. This way, you can see where your money is going and make informed decisions about how to allocate your budget. Our goal is to create a relationship built on trust and clarity.

Conclusion

Luxe3D is committed to delivering exceptional 3D design solutions tailored to your budget. Whether you are embarking on a large-scale architectural project or need stunning product visuals, we work collaboratively to find a path that suits your financial constraints while ensuring top-quality results.

Contact Luxe3D today to discuss your project and see how we can bring your vision to life within your budget!

Can You Work Within My Budget?2024-10-31T13:05:58+00:00

What Industries Does Luxe3D Specialize In?

What Industries Does Luxe3D Specialize In?

At Luxe3D, we bring a broad range of 3D design and rendering expertise tailored to specific industries. Our services are designed to meet the unique demands of each sector, offering detailed, lifelike visualizations that enhance marketing efforts, streamline design processes, and improve client experiences. Here’s a breakdown of the core industries Luxe3D specializes in and how our tailored approach brings value to each.

Architecture

Architecture is one of our foundational industries at Luxe3D. Our architectural 3D renderings capture the intricacies of buildings, both interior and exterior, creating immersive visuals that help architects and developers convey the design intent accurately. We produce high-resolution visuals that bring blueprints to life, giving clients a true-to-scale view of how spaces will look post-construction.

Our Architectural Visualization Services Include:

  • Exterior building renderings
  • Interior space renderings
  • Aerial views to showcase the building within its environment

These realistic renderings are essential for architects, planners, and investors who need to visualize and communicate complex designs.

Real Estate and Property Development

Luxe3D works closely with real estate agents, developers, and property managers to create engaging 3D visualizations that help potential buyers experience a property before it’s built. By delivering photorealistic visuals, we enable real estate professionals to market properties more effectively, attract buyers, and enhance listing presentations.

Real Estate Services We Offer:

  • Photorealistic 3D tours for unbuilt properties
  • Virtual staging to illustrate the potential of empty spaces
  • Interactive walkthroughs to give buyers an in-depth experience

Luxe3D’s 3D services are ideal for real estate listings, marketing campaigns, and client presentations that rely on impactful visuals.

Product Design and Manufacturing

Our 3D modeling and rendering services provide product designers and manufacturers with precise models that showcase products from all angles, bringing out every detail and texture. These models can be used in product development stages, marketing collateral, and e-commerce, enabling companies to market their products effectively online.

Product Design Specialties Include:

  • Detailed product renderings for marketing and advertisements
  • 3D prototypes to test design concepts
  • High-resolution models for interactive product views on e-commerce sites

Luxe3D’s product renderings are popular among consumer goods, electronics, furniture, and automotive industries, where visual quality and detail are essential for customer engagement.

Interior Design

Luxe3D brings interior designs to life with renderings that illustrate the exact look and feel of a finished space, allowing designers and clients to visualize their project down to the finest details. This is especially helpful for designers and clients who wish to see the textures, lighting, and overall ambiance before any physical changes are made.

Interior Design Services Include:

  • Room-specific renderings for residential and commercial projects
  • Material and lighting simulation for an accurate depiction of design choices
  • Layout previews to experiment with furniture and decor arrangements

This service is invaluable for interior designers, renovation experts, and homeowners looking to visualize and refine their ideas.

Marketing and Advertising

Luxe3D’s visual content boosts marketing and advertising efforts by producing impactful 3D visuals tailored to campaigns. We create compelling visuals that communicate a brand’s message through high-quality, attention-grabbing images and animations, making Luxe3D a powerful asset for marketing professionals.

Marketing and Advertising Visuals Include:

  • Attention-grabbing product animations for social media and ad campaigns
  • CGI content for commercials and video ads
  • Customizable visual assets to suit various media formats and platforms

Luxe3D’s marketing visuals stand out by offering brands a high level of creative control and the ability to produce immersive content that resonates with audiences.

Hospitality and Retail

Luxe3D works with the hospitality and retail industries to produce engaging visuals that help clients and customers experience these spaces ahead of time. Our 3D renderings showcase the layout, ambiance, and branding elements, providing retailers and hoteliers a way to visually communicate what their spaces offer.

Hospitality and Retail Visualizations:

  • Virtual tours of hotels, restaurants, and retail stores
  • Design renderings for promotional materials and social media
  • Customized environments that reflect a brand’s aesthetic

These visuals are invaluable for attracting customers, especially in a competitive market, as they provide a realistic, immersive look into what each space offers.

Why Luxe3D Is the Right Choice for Your Industry

At Luxe3D, we tailor our 3D rendering services to the specific needs of each industry, combining industry knowledge with cutting-edge 3D technology. Whether you’re in architecture, real estate, product design, interior design, marketing, hospitality, or retail, our team is equipped to deliver impactful visuals that elevate your project and leave a lasting impression on your audience.

Get in touch with Luxe3D to bring your next project to life with industry-leading 3D rendering services designed to captivate and inspire.

What Industries Does Luxe3D Specialize In?2024-10-30T10:10:44+00:00

What Types of 3D Design Services Does Luxe3D Offer?

What Types of 3D Design Services Does Luxe3D Offer?

The Heart of Your 3D Design Agency: High-Performance Workstations

At Luxe3D, we specialize in a broad array of 3D design services tailored to enhance the visual impact of projects across industries. Whether you’re an architect, interior designer, product developer, or part of a marketing team, our goal is to turn your ideas into stunning, hyper-realistic visualizations that captivate audiences and add substantial value to your projects.

Architectural Visualization

Our architectural visualization services bring blueprints to life, allowing clients to explore a space before it’s built. Luxe3D uses advanced rendering techniques to deliver lifelike, immersive experiences that convey the ambiance and detail of future structures. We specialize in exterior and interior visualizations for residential, commercial, and landscape projects.

Examples of Architectural Visualization Services:

  • Exterior Renderings for residential and commercial buildings
  • Interior Renderings to showcase detailed designs of specific spaces
  • Aerial Views to provide context within the surrounding environment

These services are valuable to real estate agents, developers, and designers who want to communicate a vision clearly and persuasively.

Product 3D Modeling and Rendering

Luxe3D’s product 3D modeling service helps businesses present their products in vivid detail, making it easier for potential customers to appreciate design features, colors, and textures. We can create lifelike models for product showcases, promotional videos, and even virtual showrooms.

Product Visualization Specialties Include:

  • High-resolution product renders for e-commerce and marketing
  • Conceptual modeling for prototyping and design reviews
  • Interactive 3D models for digital experiences

From consumer electronics to furniture, our 3D models enhance online presentations, making Luxe3D the ideal partner for product manufacturers and marketers.

3D Animation

For projects requiring movement, our 3D animation service enables a dynamic presentation of designs and concepts. Whether it’s a virtual walkthrough of a property or an animated sequence demonstrating a product’s functions, Luxe3D can create detailed, high-quality animations that engage viewers.

Our Animation Capabilities Cover:

  • Architectural walkthroughs for immersive space exploration
  • Product demonstrations that showcase functionality
  • Process animations to visually explain complex procedures

Animation adds a powerful storytelling element, ideal for presentations, marketing, and client proposals.

Virtual Reality (VR) Integration

Luxe3D offers VR content, bridging the gap between design and interactive experiences. Our VR services allow clients to experience spaces or products from different angles, interactively, using their smartphones or VR headsets.

VR Solutions at Luxe3D:

  • VR tours for real estate showrooms and architecture firms
  • Virtual prototyping for design testing and concept validation

This immersive technology enhances engagement and it’s ideal for companies looking to leverage interactive experiences.

Custom 3D Solutions and Consulting

Luxe3D recognizes that each project is unique, and we tailor solutions to meet specific client needs. Our team offers consulting services to help clients identify the best visualization approach for their projects, ensuring that our solutions align perfectly with their goals.

What Our Custom Solutions Include:

  • Project analysis to determine the optimal visualization strategy
  • Custom-built 3d renderings and animations for specialized needs
  • Workflow and optimization consulting to maximize efficiency and results

We’re here to guide you every step of the way, from concept to final output.

Why Choose Luxe3D?

With our deep expertise and a focus on precision, Luxe3D strives to provide the highest quality 3D visuals in the industry. By utilizing cutting-edge software and offering tailored solutions, we ensure each project achieves the highest level of visual impact. Luxe3D is dedicated to enhancing brand stories through 3D visualization, helping clients stand out and connect with their audiences.

Ready to transform your project with exceptional 3D design services? Contact Luxe3D to explore the possibilities.

Conclusion:

Whew! We’ve been on quite a journey through the hardware landscape of a 3D design agency, haven’t we? From beefy workstations to mind-bending VR setups, we’ve covered it all. And let me tell you, if there’s one thing I’ve learned in this crazy business, it’s that having the right tools can make all the difference between a good design agency and a great one.

Remember, folks, your hardware is like the paintbrush to your digital Picasso. You wouldn’t try to paint the Mona Lisa with a toothbrush, would you? (Well, maybe for a quirky art project, but you get my point!) Investing in quality hardware isn’t just about having shiny new toys – it’s about giving your creativity the runway it needs to take flight.

But here’s the kicker – all the fancy hardware in the world won’t make up for lack of talent or vision. It’s like giving a kid a professional camera and expecting them to shoot a National Geographic cover. The magic happens when you combine top-notch hardware with skill, creativity, and a dash of that secret sauce that makes your agency unique.

So, take a good, hard look at your current setup. Is it helping you soar, or is it holding you back? Maybe it’s time for an upgrade, or maybe you just need to optimize what you’ve got. Either way, don’t be afraid to invest in your tools. Your future self (and your clients) will thank you.

And hey, don’t forget to have fun with it! This tech stuff can be intimidating, but at the end of the day, we’re basically playing with really expensive, really cool toys. Embrace your inner geek! Get excited about that new graphics card, geek out over render times, maybe even name your render farm. (Ours is called “The Pixel Pit”. Don’t judge.)

Remember, in the world of 3D design, your hardware can be the difference between “Wow!” and “Meh.” So treat it right, keep it updated, and for the love of all that is holy, don’t spill coffee on it. (Learn from my mistakes, people!)

Now, go forth and create amazing things! Your clients are waiting to be wowed, and with the right hardware at your fingertips, you’re ready to knock their socks off. Just maybe keep a spare pair of socks handy, just in case. You know, for the sock-knocking-off thing. Okay, I’ll stop now.

Happy rendering, folks! May your polygons be plentiful and your render times be short!

What Types of 3D Design Services Does Luxe3D Offer?2024-10-30T10:01:15+00:00

3D Rendering: Elevating Luxury Hotel Design in Dubai

How 3D Rendering Enhances the Visual Appeal of Luxury Dubai Hotels with Luxe3D.co.uk 3D Design Agency

Introduction

Picture this: a luxury hotel in Dubai, known for its futuristic architecture and world-class interiors, rendered in lifelike 3D before the first brick is even laid. This is the power of 3D rendering. Luxe3D.co.uk, a top 3D design agency, helps developers and designers bring their grand visions to life in one of the most competitive hospitality markets in the world. By providing hyper-realistic 3D renderings, we allow stakeholders to visualize the final product and ensure their Dubai hotel is as visually stunning as it is functional.

For any 3D design agency, especially in a city like Dubai where architectural brilliance is the standard, the ability to render projects accurately is crucial. Luxe3D.co.uk delivers precision, allowing luxury hotels to stand out and refine their design from the very beginning.

Dubai 1

What is 3D Rendering and Why Does a Dubai Hotel Need It?

In the competitive Dubai hotel market, first impressions matter more than ever. 3D rendering is the process of creating lifelike images from architectural designs, helping developers and designers visualize their projects before they materialize. This technology is invaluable for luxury hotels where every design detail, from lobby chandeliers to architectural facades, must be perfect.

Luxe3D.co.uk, as a specialized 3D design agency, brings these ideas to life with state-of-the-art 3D rendering services. For Dubai hotels, this means being able to experiment with designs, adjust materials, and tweak lighting to create the perfect ambience. The immersive visual experience that 3D rendering provides ensures that all stakeholders are on the same page and any design issues are identified early on.

Not only is 3D rendering great for project development, but it also becomes a key tool in marketing and presenting your luxury hotel in the best light.

Showcasing Dubai’s Iconic Hotel Architecture with 3D Rendering

Dubai 3

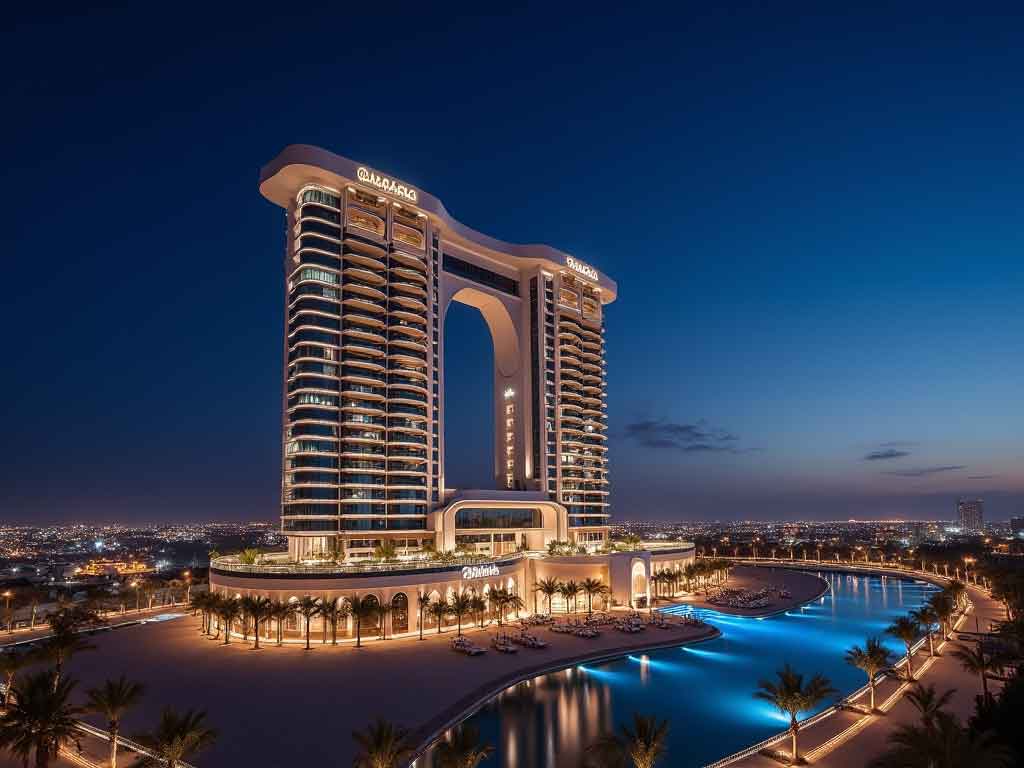
Dubai’s skyline is filled with architectural wonders like the Burj Al Arab and Atlantis The Palm. For developers aiming to create the next iconic hotel, working with a 3D design agency like Luxe3D.co.uk is a must. Our advanced 3D rendering services allow you to visualize your hotel’s exterior and understand how it will fit into the landscape of Dubai.

Luxe3D.co.uk creates stunning, photorealistic 3D renderings that capture every architectural detail. This helps in showcasing the hotel’s unique style while ensuring the design blends with Dubai’s distinctive skyline. From daylight renderings that highlight the exterior’s grandeur to evening views that capture the allure of Dubai’s nightlife, our renderings help developers make key design decisions confidently.

Our 3D visualizations also help you present your luxury Dubai hotel’s design to potential investors, giving them a real-world sense of the project. These realistic renderings can make or break an investor pitch by showcasing the full scope of your hotel’s architectural splendor.

Creating Luxury Hotel Interiors with 3D Rendering at Luxe3D.co.uk

Once the exterior design is approved, the focus shifts to the interiors, where Luxe3D.co.uk, your expert 3D design agency, truly excels. For luxury Dubai hotels, the interior design is just as important as the facade. Every suite, lobby, and restaurant space needs to reflect the hotel’s brand of luxury, and our 3D rendering services ensure that every detail is perfect.

With Luxe3D.co.uk, hotel developers can experiment with various materials, lighting options, and layouts to create interiors that embody luxury. Whether it’s the gold-accented lobby or the marble-clad bathrooms, our 3D renderings allow you to see the effect of every design choice. This ensures that the final result is as stunning in real life as it is in the rendering.

We work closely with interior designers to capture every nuance of luxury, from the texture of fabrics to the reflection of light on glass surfaces. This attention to detail ensures that guests experience the epitome of comfort and opulence from the moment they step inside.

Marketing Your Dubai Hotel with 3D Walkthroughs and Virtual Tours

The power of 3D rendering doesn’t stop at design – it extends into marketing as well. Luxe3D.co.uk takes renderings a step further by offering 3D walkthroughs and virtual tours, helping developers market their Dubai hotel even before it’s completed. This immersive technology allows potential guests and investors to explore the hotel from the comfort of their own homes.

By partnering with Luxe3D.co.uk, a leading 3D design agency, you can present your hotel in the best light possible, making an unforgettable first impression. Imagine potential guests walking through your Dubai hotel’s opulent corridors, checking out the luxurious suites, or getting a virtual sneak peek at the rooftop pool – all through an engaging virtual tour.

These tools are not only great for marketing but also invaluable for making design tweaks and securing early bookings, giving you a head start in Dubai’s competitive hotel market.

Dubai 4

Conclusion

In Dubai’s luxury hotel market, standing out is not just an option – it’s a necessity. By partnering with Luxe3D.co.uk, a trusted 3D design agency, you’ll get access to cutting-edge 3D rendering technology that ensures your hotel design is perfect before a single brick is laid. From visualizing your hotel’s exterior in the vibrant Dubai skyline to crafting luxurious interiors, our 3D rendering services help bring your vision to life.

Ready to make your mark in Dubai’s skyline? Contact Luxe3D.co.uk today and see how our 3D design agency can help turn your hotel project into a reality.

Dubai 7

3D Rendering: Elevating Luxury Hotel Design in Dubai2024-10-18T12:22:52+00:00

Essential Hardware for 3D Interior Visualization: A 3D Design Agency’s Guide

Essential Hardware for 3D Interior Visualization: A 3D Design Agency’s Guide

The Heart of Your 3D Design Agency: High-Performance Workstations

Alright, let’s dive into the nitty-gritty of high-performance workstations for 3D interior visualization. Trust me, I’ve learned this the hard way – skimping on your hardware is like trying to paint the Sistine Chapel with a toothbrush. It’s possible, but man, is it frustrating!

First up, let’s talk processors. You know, those little brain chips that make everything tick. For 3D rendering, you want a CPU that’s beefier than a linebacker. I remember when I first started out, I thought I could get away with a mid-range processor. Boy, was I wrong! I’d hit render and go make a sandwich, do my taxes, and learn a new language before it finished. Now, I swear by processors with high core counts and clock speeds. AMD’s Threadripper or Intel’s Xeon series are like the superheroes of the CPU world for 3D work.

But here’s the real kicker – graphics cards. GPUs are where the magic happens in real-time visualization. It’s like the difference between a flip book and a 4K movie. I once had a client walk in while I was working on a low-end GPU. The scene was lagging so bad, they thought I was pitching them a stop-motion project! Nowadays, I won’t touch anything less than an NVIDIA RTX series. Those babies handle real-time ray tracing like a dream.

Now, let’s chat about RAM. In the world of 3D visualization, RAM is like pizza – there’s no such thing as too much. I learned this lesson when I tried to open a complex scene and my computer just gave up and took a nap. Seriously, 32GB is the bare minimum these days. If you’re dealing with huge architectural scenes or photo-realistic interiors, 64GB or even 128GB isn’t overkill. It’s like giving your computer a big ol’ cup of coffee – everything just runs smoother.

Lastly, let’s not forget about storage. SSDs are the sports cars of the storage world – fast and flashy. I use them for my operating system and active projects. But here’s a pro tip: don’t forget about good old HDDs for archiving. They’re like the faithful station wagon – not as quick, but they can haul a lot of stuff. I learned this the hard way when I ran out of space on my SSDs mid-project. Talk about a facepalm moment!

Remember, your workstation is the backbone of your 3D design agency. It’s worth investing in quality components. Trust me, your future self (and your clients) will thank you when you’re churning out stunning visualizations faster than you can say “3D interior design”!

Maximizing Visual Accuracy: Professional-Grade Monitors

Let’s talk about monitors, folks. In the world of 3D interior visualization, your monitor is like a window to your digital creations. And let me tell you, looking through a dirty, warped window ain’t gonna do your masterpieces any favors!

First things first – color accuracy. This is the holy grail of monitor specs for us 3D design nerds. I remember when I first started out, I was working on this beautiful beach house interior. Spent days getting the colors just right. Then I showed up at the client meeting, pulled up the renders on their monitor, and BAM! My serene blue ocean view looked like a radioactive slime pit. Talk about embarrassing!

That’s when I learned the importance of color calibration. Now, I calibrate my monitors religiously. It’s like giving your monitor a pair of perfect glasses. I use a colorimeter – it’s this nifty little device that sits on your screen and makes sure every color is exactly where it should be. Trust me, it’s a game-changer.

Now, let’s chat about resolution and size. In this biz, bigger is usually better. I started out with a 24-inch 1080p monitor, thinking I was hot stuff. Then I upgraded to a 32-inch 4K beast, and it was like I’d been designing with my eyes closed before! Suddenly, I could see every little detail without constantly zooming in and out. It’s like the difference between squinting at a postage stamp and admiring a billboard.

But here’s where it gets really fun – multi-monitor setups. Oh boy, talk about a productivity boost! I’ve got a three-monitor setup now, and it’s like having a command center. I can have my 3D software on one screen, reference images on another, and my email or project management tools on the third. It’s like being a multitasking octopus, but with fewer arms and more pixels.

Fair warning though – once you go multi-monitor, you can never go back. I tried working on a single screen at a client’s office once, and I felt like I was trying to design through a keyhole. Not fun!

One more pro tip – don’t forget about ergonomics. Get yourself a good monitor arm or stand. Your neck will thank you after those long rendering sessions. I learned this the hard way after a week-long project left me with a crick in my neck that made me walk around like a confused pigeon.

Remember, as a 3D design agency, your monitors are your eyes into the digital world you’re creating. Make sure they’re showing you the truth, the whole truth, and nothing but the truth. Your clients (and your neck) will thank you!

Input Devices: Enhancing Precision and Workflow

Alright, let’s get our hands dirty talking about input devices. In the world of 3D interior visualization, your hands are like the paintbrushes of a digital Michelangelo. And trust me, you don’t want to be sculpting David with a potato!

First up, let’s chat about 3D mice. Now, when I first heard about these, I thought it was some gimmicky gadget. Boy, was I wrong! Using a 3D mouse for the first time was like suddenly growing an extra hand – a really smart, floaty hand that could navigate 3D space like a dream. I remember working on this complex multi-story building, and with my 3D mouse, I was zipping through floors and rooms like some kind of digital ghost. It’s not just about speed, though – the precision you get is insane. No more accidentally yeeting yourself through walls when you’re trying to adjust a lamp!

Now, let’s talk graphics tablets. If you’re not using one for texturing and modeling, you’re basically trying to paint the Mona Lisa with a brick. I learned this the hard way when I was working on this intricate Victorian-style interior. Trying to add all those ornate details with a regular mouse was like performing surgery with oven mitts. Then I got my first graphics tablet, and suddenly I was the Michelangelo of moldings! The pressure sensitivity is a game-changer for things like bump mapping or creating custom textures. Plus, it’s way easier on your wrist. Trust me, your future carpal-tunnel-free self will thank you.

But here’s the thing – don’t cheap out on your graphics tablet. I made that mistake once, bought this off-brand thing that had less sensitivity than a brick. Trying to create subtle shading was like trying to whisper with a megaphone. Not pretty.

Lastly, let’s not forget about keyboards. Now, I know what you’re thinking – “It’s just a keyboard, right?” Wrong! A good keyboard in a 3D design agency is like a good pair of shoes for a marathon runner. You’re gonna be hitting those shortcut keys more times than a woodpecker on espresso, so comfort is key. I swear by mechanical keyboards with customizable keys. I’ve got mine set up so that my most-used commands are right at my fingertips. It’s like having a secret code that makes you design faster.

Oh, and here’s a pro tip – get yourself a keyboard with backlighting. Trust me, when you’re pulling an all-nighter to meet a deadline (and we’ve all been there), being able to see your keys without turning on the overhead light is a lifesaver. I learned this after accidentally deleting an entire day’s work because I hit the wrong shortcut in the dark. Let’s just say, there was much wailing and gnashing of teeth that night.

Remember, in the world of 3D interior visualization, your input devices are an extension of your creativity. Treat them right, and they’ll help you bring your digital visions to life faster and more beautifully than ever. Now go forth and create, you digital Michelangelos!

Virtual Reality Hardware for Immersive 3D Interior Visualization

Alright, buckle up, because we’re about to dive into the wild world of Virtual Reality for 3D interior visualization. This isn’t just some fancy tech – it’s like having a magic portal that lets your clients step right into their future space. Trust me, once you go VR, you never go back!

First things first – VR headsets. Now, I remember the first time I tried VR for a client presentation. I was sweating bullets, praying the tech wouldn’t fail me. But when I saw the client’s jaw drop as they “walked” through their future home, I knew we were onto something big. These days, I swear by high-end headsets like the Oculus Quest 2 or the HP Reverb G2. They’re like strapping a whole new world to your face!

But here’s the kicker – make sure you’ve got enough space cleared. I once demo’d a VR walkthrough in a cramped office and ended up karate chopping my client’s coffee mug off the table. Not my proudest moment, let me tell you!

Now, let’s talk motion controllers. These babies are like magic wands for your virtual world. With the right setup, your clients can open doors, move furniture, even change wall colors on the fly. It’s like giving them godlike powers over their future space. I remember this one client who was on the fence about a bold color choice. We loaded up the VR scene, handed them the controllers, and let them paint the walls themselves. Sold! Just like that. It’s not just a visualization tool – it’s an experience.

But word to the wise – practice with the controllers before client meetings. Nothing kills the magic like fumbling around trying to figure out which button does what. Trust me, I learned this the hard way when I accidentally teleported myself into a virtual wall during a presentation. Not exactly the smooth operator image I was going for!

Now, let’s chat about VR-ready computers. This is where the rubber meets the road, folks. You need a machine that can handle VR like a champ, or you’ll end up with a presentation that’s more “nausea-inducing nightmare” than “immersive experience.” I’m talking high-end GPUs, beefy CPUs, and more RAM than you think you need. Then double it.

I remember trying to run a complex VR scene on an underpowered laptop once. The framerate was so bad, my client asked if we were visualizing a strobe-lit disco instead of their elegant living room. Lesson learned!

One more pro tip – always have a backup plan. Technology can be fickle, especially when you’re trying to impress clients. I always have a set of traditional renderings ready to go, just in case. It’s saved my bacon more than once when the VR gods weren’t smiling on me.

Remember, as a 3D design agency, VR isn’t just a cool toy – it’s a powerful tool that can take your presentations from “meh” to “mind-blowing.” Master this tech, and you’ll have clients lining up around the block to step into your virtual worlds. Now go forth and revolutionize those presentations!

Rendering Farms: Boosting Your 3D Design Agency’s Capabilities

Let’s talk rendering farms, folks. If you’re running a 3D design agency and you’re not using a rendering farm, you’re basically trying to win a drag race with a bicycle. Trust me, I’ve been there, and it ain’t pretty.

First up, let’s chat about in-house rendering servers. Now, I remember the first time I set up a small rendering farm in our office. It was like watching my firstborn take its first steps – magical, but also terrifying. We had a bunch of old computers gathering dust, so we networked them together and boom! Instant render farm. Well, not exactly instant. There was a lot of cursing, troubleshooting, and one minor electrical fire. But when we finally got it running? Oh boy, it was like strapping a rocket to our workflow.

The beauty of an in-house setup is that you have complete control. Need to tweak some settings at 3 AM because you just had a brilliant idea? Go right ahead! No need to wait for tech support on the other side of the world to wake up. Plus, there’s something satisfying about hearing all those machines humming away, turning your digital dreams into reality.

But here’s the thing – maintaining an in-house farm is like having a temperamental pet. It needs constant attention, upgrades, and sometimes it decides to take a nap right when you need it most. I once had a crucial render fail because a mouse had decided to make a home in one of our servers. Let’s just say, I now have a very strict “no rodents” policy in the server room.

Now, let’s talk cloud rendering. This is like having a genie in a bottle, except instead of three wishes, you get virtually unlimited rendering power. I was skeptical at first – uploading my precious files to some mysterious “cloud”? Sounds like a recipe for disaster, right? But let me tell you, once I tried it, I was hooked.

The first time I used cloud rendering, I nearly fell out of my chair. A render that would have taken our in-house farm all night was done in under an hour. It was like going from a horse-drawn carriage to a Ferrari overnight. Plus, no more worrying about hardware failures, power outages, or rogue mice.

But here’s the catch – cloud rendering can get expensive real quick if you’re not careful. It’s like having a credit card with no limit – super convenient, but dangerous if you lose track. I once got so excited about the speed that I forgot to keep an eye on the costs. Let’s just say, that month’s bill was a real eye-opener. Now, I treat cloud rendering like a fancy restaurant – great for special occasions, but not for everyday meals.

The key is finding the right balance between in-house and cloud rendering. It’s like being a DJ – you need to know when to drop the bass (use cloud) and when to keep it chill (stick with in-house). For those big, complex projects with tight deadlines? Cloud all the way. For your everyday visualizations? Your in-house setup should do just fine.

Now, let’s talk about the holy grail – balancing cost and rendering speed. This is where the real magic happens, folks. It’s like trying to find the perfect ratio of coffee to creamer – too much of either, and you’ve ruined a perfectly good cup of joe.

I learned this lesson the hard way when I was working on this massive hotel project. We had a tight deadline, so I threw everything at the cloud render farm. The renders came back lightning fast, but so did the bill. I think I saw our accountant cry that day. Since then, I’ve developed a system. I use our in-house farm for test renders and iterations, then send the final high-quality renders to the cloud. It’s like having your cake and eating it too!

Here’s a pro tip – invest in good rendering management software. It’s like having a smart assistant that knows exactly which renders to send where. I use it to automatically divert renders to the cloud during our office’s off-hours, taking advantage of lower rates. It’s saved us a ton of money and headaches.

Remember, as a 3D design agency, your rendering capabilities can make or break your projects. Whether you’re team in-house, team cloud, or playing for both sides, the key is to stay flexible. Be like water, my friend – adapt to the needs of each project.

And hey, if all else fails, there’s always the tried-and-true method of crossing your fingers and hoping for the best. Just kidding! (But seriously, a little luck never hurts in this business.)

Now go forth and render like the wind! Your clients will thank you, your competitors will envy you, and your accountant… well, they might still give you the side-eye, but that’s just part of the fun, right?

Networking and Data Management for 3D Design Agencies

Alright, let’s dive into the world of networking and data management for 3D design agencies. Now, I know what you’re thinking – “Ugh, boring tech stuff!” But trust me, this is the secret sauce that can take your agency from “meh” to “magnificent.” It’s like the plumbing in a beautiful house – not sexy, but boy, you’ll notice when it’s not working right!

First up, let’s talk about high-speed networking equipment. In a 3D design agency, your network is like the circulatory system of your digital body. You want that data flowing smooth and fast, like a greased-up cheetah on roller skates. I remember when we first upgraded our network – it was like going from a garden hose to a fire hose. Suddenly, files that used to take ages to transfer were zipping across the office faster than office gossip!

But here’s a word of warning – don’t skimp on your network setup. I learned this the hard way when I tried to save a few bucks by using consumer-grade equipment. Big mistake! Our network was about as reliable as a chocolate teapot. We’d be in the middle of a big file transfer, and bam! Everything would grind to a halt. I swear I could hear our designers’ souls leaving their bodies every time it happened.

Now, let’s chat about NAS devices. These bad boys are like the Swiss Army knives of data storage. They’re not just hard drives – they’re like having your own personal cloud right in your office. I remember the day we set up our first NAS. It was like watching the monolith scene from 2001: A Space Odyssey. Suddenly, all our data was in one place, accessible from anywhere in the office. No more running around with USB sticks like we were playing some deranged game of digital hot potato!

But here’s the kicker – make sure you set up proper access controls. One time, we had an intern accidentally delete an entire project folder. I think I aged ten years in the five minutes it took us to restore from backup. Speaking of which…

Data backup solutions! This is the safety net for your digital trapeze act. Trust me, you do not want to be caught without a good backup system. It’s like trying to walk a tightrope without a net – exciting, but potentially catastrophic. I learned this lesson the hard way when our main server decided to do its best impression of a large, expensive paperweight. Thank the tech gods we had a solid backup system in place!

Here’s a pro tip – follow the 3-2-1 rule. Three copies of your data, on two different media, with one off-site. It’s like having insurance for your insurance. I sleep a lot better at night knowing our data is safer than Fort Knox.

Now, let’s talk about managing all those massive 3D files. It’s like trying to organize a herd of digital elephants – they’re big, they’re unwieldy, and they have a tendency to trample all over your storage space if you’re not careful. We use a combination of file naming conventions and folder structures that would make a librarian weep with joy. It’s not the most exciting part of the job, but boy, does it save time when you’re trying to find that one specific file from a project you did three years ago!

Remember, in a 3D design agency, your network and data management systems are the unsung heroes. They’re like the stage crew in a Broadway show – you don’t see them, but without them, the whole production falls apart. So give them the love and attention they deserve!

And hey, if all else fails, there’s always the “turn it off and on again” method. It works more often than you’d think! (But seriously, please don’t rely on that. Your IT person will thank you.)

Now go forth and may your data flow as smoothly as a perfectly rendered 3D scene!

Future-Proofing Your 3D Design Agency’s Hardware

Alright, folks, let’s talk about future-proofing your 3D design agency’s hardware. This is like trying to predict the future, but instead of a crystal ball, we’re using high-tech gadgets. It’s part science, part art, and part wild guessing game. But don’t worry, I’ve got some tips to help you navigate this digital crystal maze!

First up, let’s chat about upgradeability. This is crucial, folks. You want hardware that can grow with your needs, like a high-tech Chia Pet. I learned this lesson the hard way when I bought a fancy all-in-one system for the office. Sure, it looked sleek, but trying to upgrade it was like performing surgery on a peanut. Now, I always go for systems with easily accessible components. It’s like buying pants with an elastic waistband – room to grow!

But here’s the thing – don’t go overboard with upgradability. I once bought a massive tower case thinking, “Look at all this room for activities!” Two years later, it was still mostly empty, like a cavernous monument to my overzealous planning. Balance is key, folks.

Now, let’s talk about staying current with hardware trends. This is like trying to keep up with fashion, except instead of clothes, we’re talking about processors and graphics cards. It can feel like a never-ending treadmill of new releases and “must-have” upgrades. But here’s a secret – you don’t need to be on the bleeding edge all the time.

I remember when ray tracing first hit the scene. Everyone was scrambling to upgrade, but we held back. Guess what? A year later, we got better performance for half the price. Sometimes, being a late adopter pays off. It’s like waiting for the director’s cut of a movie – you get all the good stuff without the initial bugs.

But don’t get too comfortable! Keep an eye on those industry trends. Subscribe to tech blogs, attend conferences, maybe even make friends with that weird guy at the computer store who always knows about the latest gear. (Hi, Steve!) Knowledge is power, especially when it comes to planning your upgrades.

Now, here’s the million-dollar question – how do you balance cost and performance for long-term success? This is the holy grail of hardware management, folks. It’s like trying to find the perfect balance between eating salad and pizza – tricky, but oh so important.

Here’s my strategy: I divide our hardware into tiers. Tier 1 is our workhorse machines – these get the latest and greatest because they’re cranking out renders day and night. Tier 2 is for general design work – they get updated every other cycle. Tier 3 is for admin and support staff – as long as they can run Office and not catch fire, we’re good.

This tiered approach helps spread out the cost of upgrades over time. It’s like a hardware version of dollar-cost averaging. Plus, it means we’re not trying to upgrade the entire office at once, which would be like trying to change all four tires on a car while it’s still moving.

Here’s a pro tip – set aside a “mad money” fund for unexpected tech developments. It’s like an emergency fund, but for when the next big thing in 3D visualization drops. We used ours to jump on VR when it first hit the scene, and boy, did that give us a leg up on the competition!

Remember, future-proofing isn’t about predicting the future perfectly. It’s about being flexible and ready to adapt. It’s like being a digital Boy Scout – always prepared!

And hey, if all else fails, just remember – in the world of tech, today’s cutting-edge marvel is tomorrow’s obsolete paperweight. So don’t stress too much about getting it perfect. As long as you’re moving forward, you’re doing alright.

Now go forth and future-proof with confidence! May your hardware always be one step ahead of the game, and may your renders always finish before the coffee gets cold.

Conclusion:

Whew! We’ve been on quite a journey through the hardware landscape of a 3D design agency, haven’t we? From beefy workstations to mind-bending VR setups, we’ve covered it all. And let me tell you, if there’s one thing I’ve learned in this crazy business, it’s that having the right tools can make all the difference between a good design agency and a great one.

Remember, folks, your hardware is like the paintbrush to your digital Picasso. You wouldn’t try to paint the Mona Lisa with a toothbrush, would you? (Well, maybe for a quirky art project, but you get my point!) Investing in quality hardware isn’t just about having shiny new toys – it’s about giving your creativity the runway it needs to take flight.

But here’s the kicker – all the fancy hardware in the world won’t make up for lack of talent or vision. It’s like giving a kid a professional camera and expecting them to shoot a National Geographic cover. The magic happens when you combine top-notch hardware with skill, creativity, and a dash of that secret sauce that makes your agency unique.

So, take a good, hard look at your current setup. Is it helping you soar, or is it holding you back? Maybe it’s time for an upgrade, or maybe you just need to optimize what you’ve got. Either way, don’t be afraid to invest in your tools. Your future self (and your clients) will thank you.

And hey, don’t forget to have fun with it! This tech stuff can be intimidating, but at the end of the day, we’re basically playing with really expensive, really cool toys. Embrace your inner geek! Get excited about that new graphics card, geek out over render times, maybe even name your render farm. (Ours is called “The Pixel Pit”. Don’t judge.)

Remember, in the world of 3D design, your hardware can be the difference between “Wow!” and “Meh.” So treat it right, keep it updated, and for the love of all that is holy, don’t spill coffee on it. (Learn from my mistakes, people!)

Now, go forth and create amazing things! Your clients are waiting to be wowed, and with the right hardware at your fingertips, you’re ready to knock their socks off. Just maybe keep a spare pair of socks handy, just in case. You know, for the sock-knocking-off thing. Okay, I’ll stop now.

Happy rendering, folks! May your polygons be plentiful and your render times be short!

Essential Hardware for 3D Interior Visualization: A 3D Design Agency’s Guide2024-10-11T10:02:20+00:00

Why Interior Designers Should Use 3D Visualization for Projects by a 3D Design Agency

Why Interior Designers Should Use 3D Visualization for Projects by a 3D Design Agency

Introduction

Did you know that working with a 3D design agency can help interior designers get project approvals up to 50% faster? It’s true! When clients can visualize their future space before construction even begins, the entire process runs much more smoothly. In today’s design landscape, 3D visualization tools have become a critical asset for any designer. By partnering with a professional 3D design agency, you can showcase your concepts in a highly realistic and immersive way, making it easier for clients to grasp your vision and make informed decisions.

With the support of a 3D design agency, you can bridge the gap between traditional design methods and cutting-edge technology, delivering stunning visualizations that enhance client understanding. Let’s dive into why interior designers should collaborate with a 3D design agency to bring their projects to life.

Enhanced Client Communication

Clear communication is key in any design project, and that’s where a 3D design agency can make a huge difference. Interior designers often face the challenge of helping clients understand complex ideas. Instead of relying on flat, 2D sketches, a 3D design agency can create detailed renderings that show clients exactly what their space will look like. This eliminates confusion and drastically reduces the need for revisions.

By working with a 3D design agency, you ensure that your clients see lifelike representations of their future homes or offices. This clarity leads to faster decision-making and more confident clients, ultimately streamlining the entire design process. The high-quality visualizations produced by a 3D design agency make it easier to convey the full scope of your vision.

Accurate Space Planning and Measurements

When it comes to space planning, precision is everything. Partnering with a 3D design agency allows you to present accurate, scale models of your designs that clients can fully understand. Instead of just looking at measurements on a page, clients can see how furniture, décor, and architectural elements will fit into the space in real-time. A 3D design agency ensures that every detail is accounted for, preventing costly mistakes and misunderstandings.

This attention to detail is crucial, especially when dealing with clients who struggle to visualize spatial relationships. A 3D design agency can provide dynamic, realistic views of your layout, making it much easier for clients to grasp the overall flow and dimensions of the space.

Visualizing Design Concepts Before Construction

One of the main reasons interior designers should collaborate with a 3D design agency is the faster project approval process. When clients are presented with realistic, detailed visualizations, they are more likely to approve designs quickly. A 3D design agency can create interactive models that allow clients to explore every aspect of the space, from layout to décor. This immersive experience builds client confidence and reduces the time spent on revisions.

By using high-quality 3D visualizations, a 3D design agency helps you convey your vision clearly and professionally. Clients can make decisions based on what they see, leading to faster approvals and a smoother workflow overall.

Faster Project Approvals

One of the main reasons interior designers should collaborate with a 3D design agency is the faster project approval process. When clients are presented with realistic, detailed visualizations, they are more likely to approve designs quickly. A 3D design agency can create interactive models that allow clients to explore every aspect of the space, from layout to décor. This immersive experience builds client confidence and reduces the time spent on revisions.

By using high-quality 3D visualizations, a 3D design agency helps you convey your vision clearly and professionally. Clients can make decisions based on what they see, leading to faster approvals and a smoother workflow overall.

Better Collaboration with Other Professionals

Interior design projects often involve collaboration with architects, contractors, and other professionals. A 3D design agency can help facilitate this collaboration by providing detailed, comprehensive models that everyone can work from. When all stakeholders are able to see the same design in a 3D format, it reduces the chances of errors and miscommunications.

Working with a 3D design agency allows you to present unified, cohesive plans to your team, ensuring that the project runs smoothly from start to finish. The visual clarity provided by a 3D design agency enhances communication across the board, making it easier to coordinate with other professionals and execute your vision seamlessly.

Increased Client Satisfaction and Referrals

Happy clients are the best form of marketing, and a 3D design agency can help you deliver results that impress. By offering clients high-quality, realistic visualizations, you increase their confidence in the project and boost satisfaction. A 3D design agency helps you bring your creative ideas to life in a way that exceeds client expectations.

Not only does this lead to increased client satisfaction, but it also improves your chances of receiving referrals. When clients see the stunning work produced by a 3D design agency, they are more likely to recommend your services to others. In a competitive market, this added value can set you apart and lead to future projects.

Conclusion

Partnering with a 3D design agency can significantly elevate the work of interior designers by improving client communication, providing accurate space planning, and speeding up project approvals. Whether you’re looking to impress clients, collaborate more effectively with other professionals, or enhance your portfolio, a 3D design agency offers the tools and expertise you need to succeed. By leveraging 3D visualization, interior designers can deliver more polished, realistic, and engaging presentations, leading to higher client satisfaction and a stronger business. So why not take advantage of the power of a 3D design agency for your next project?

Why Interior Designers Should Use 3D Visualization for Projects by a 3D Design Agency2024-10-11T09:52:48+00:00

Interior Design 3D Rendering Guide: Everything You Need to Know

Interior Design 3D Rendering Guide: Everything You Need to Know

Did you know that 68% of interior designers say 3D rendering has revolutionized their design process? That’s right!

What is 3D Rendering in Interior Design?

3D rendering in interior design is like having a magic lens that lets you see your design ideas come to life before you’ve even touched a single piece of furniture. If you’re new to this, imagine walking through a space that exists only in your imagination—except now it’s fully visualized on your computer screen, down to the light hitting the floor just right. That’s the power of 3D rendering.

At its core, 3D rendering is a process where you take a 3D model of a space—say, a living room—and convert it into a 2D image that looks so real it could be a photograph. You can apply textures, add lighting, and even incorporate furniture designs to visualize how the space will feel in the real world. It’s kind of like using Lego bricks to build your dream room—except way more precise and way more visually stunning.

The great thing about 3D rendering is that it isn’t just for visual effect. It’s a crucial tool for interior designers because it helps communicate ideas to clients without the “what ifs.” Clients no longer have to imagine your designs based on swatches and mood boards. They get to see, almost firsthand, how their future home or office will look. Trust me, that moment when a client sees their ideas fully rendered in 3D? It’s like magic, and they’ll often fall in love with the design right there.

The technical process behind it can get complex, but don’t let that scare you off. You start with a basic 3D model, then you add textures—such as wood grain for a floor, fabric for a sofa—and set up lighting to give the space depth and realism. Finally, you “render” it into an image, which is the process of creating the final, high-quality visual output. It’s like baking a cake; you mix the ingredients, pop it in the oven, and after some time, out comes this beautiful, polished result.

Benefits of Using 3D Rendering for Interior Design

Oh man, where do I even start with the benefits of 3D rendering in interior design? When I first started using it, I felt like I had unlocked a superpower. Here’s why:

First, enhanced visuals. Before 3D rendering, you’d sketch out a room design or create 2D floor plans. These work, but they don’t truly capture the feel of a space. With 3D rendering, you can present fully furnished, lifelike images of a room. And when it’s done right, it’s like looking at a photograph of a room that doesn’t even exist yet.

Then there’s improved client communication. No more trying to explain abstract ideas to a client who might not have the same visual imagination as you do. Clients can now see exactly what you mean. You won’t believe how many times I’ve shown clients 3D renders, and they go, “Oh! Now I get it!” It helps bridge that creative gap.

Another major perk is the cost and time efficiency. 3D rendering helps cut down revisions drastically. Clients can see everything up front, which means fewer back-and-forth changes. I used to spend weeks tweaking designs, but once I started incorporating 3D renders, decisions happened faster, and I could wrap up projects much sooner.

And let’s not forget photorealism. The ability to create renders that look like real photos? That’s a game-changer. Whether it’s replicating the natural lighting or getting the wood texture just right, 3D rendering offers a level of detail that brings your designs to life in ways that simple sketches can’t.

Choosing the Right 3D Rendering Software for Interior Designers

Choosing the right software can feel overwhelming. There are so many options, each with different features, price points, and learning curves. So, how do you pick the right one?

First off, you’ve got to consider cost. If you’re just starting out or working on smaller projects, a free or low-cost option like Blender might be all you need. Blender is powerful, but its interface can be a bit daunting at first. On the other hand, if you want premium features and a smoother user experience, SketchUp or V-Ray could be better fits. These aren’t cheap, but they offer a wide range of tools specifically tailored to interior designers.

Ease of use is another big factor. I’ll be honest, when I first started with rendering software, I felt like I was learning a whole new language. That’s why I always recommend beginners try tools like SketchUp or Lumion, which have user-friendly interfaces and plenty of online tutorials. Once you’re comfortable with the basics, you can graduate to more advanced software like 3ds Max or V-Ray.

But what really matters is the quality of rendering. If you’re aiming for photorealistic results, you’ll want to invest in high-quality software. V-Ray is top-tier when it comes to creating realistic lighting and textures, and it’s used by professionals around the world for a reason.

If you’re not sure which software to start with, I recommend starting small and building your way up. When I was just starting, I began with SketchUp and gradually transitioned to V-Ray as I got more experienced. There’s no shame in starting with simpler software while mastering the basics.

Step-by-Step Guide to Creating a 3D Interior Design Render

Now that you’re familiar with the concept and benefits of 3D rendering, let’s dive into the step-by-step process of creating your own stunning 3D interior design renders. Trust me, once you get the hang of it, it’s an incredibly rewarding experience!

Step 1: Conceptualize the Design

Before you even open your software, take some time to think through your design. Grab a sketchbook, or even just a piece of paper, and jot down your ideas. What’s the vibe you want to create? Are you aiming for a cozy, modern living room or a sleek, minimalistic kitchen? Getting your ideas on paper will help you stay focused when you start modeling. I once spent hours trying to figure out a design only to realize I didn’t have a clear vision. Don’t be like me—plan it out first!

Step 2: Build the 3D Model

Once you’ve got a solid concept, it’s time to bring that vision into 3D. Start with the floor plan. Most software like SketchUp allows you to draw the walls and windows with ease. From there, you can begin adding furniture and fixtures. It might feel like putting together a digital puzzle, but stick with it! Remember, it doesn’t have to be perfect at first; you can always make adjustments later.

Step 3: Apply Textures and Materials

Now comes the fun part—adding textures! This is where your render will start to feel real. Choose materials that match your design concept. If you’re going for a rustic look, wood textures work wonders. If you want a sleek modern feel, shiny metal or glass textures can really pop. The right texture can elevate your design. I learned the hard way that using low-quality textures can make a render look flat and uninviting, so always opt for high-resolution images.

Step 4: Set Up Lighting

Lighting can make or break your render. It’s like the icing on the cake! You want to create a balance between natural and artificial light to achieve that warm, inviting atmosphere. Place light sources where they would realistically be in your design, such as ceiling lights, table lamps, or even sunlight streaming through the windows. I once had a render that looked lifeless because I didn’t pay enough attention to lighting, so don’t overlook this step!

Step 5: Final Rendering and Post-Processing

Once you’ve got everything in place, it’s time to hit that render button! Depending on your software and the complexity of your model, rendering might take anywhere from a few minutes to several hours. Patience is key! After the render is complete, you might want to use photo-editing software like Photoshop for any final touch-ups—like enhancing colors or correcting lighting issues. Just be careful not to overdo it; you want your render to stay true to your original design vision.

Tips for Creating Photorealistic Interior Renders

When it comes to 3D rendering, achieving photorealism can feel like a daunting task, but with a few tips, you’ll be well on your way. Here are some of the best tricks I’ve learned along the way:

  1. Use High-Quality Textures: This cannot be stressed enough! Always opt for high-resolution textures. When I started, I made the mistake of using lower-quality images to save time, and it showed in the final render. Clients notice the difference.
  2. Lighting is Key: Play around with both natural and artificial lighting. Natural light can add warmth, while artificial lights can create a cozy atmosphere. Remember, it’s all about balance! I find that experimenting with different lighting setups can lead to some surprising and beautiful results.
  3. Avoid Over-Cluttering the Scene: Less is often more. While it might be tempting to fill the room with tons of decor, try to keep it clean and organized. A cluttered scene can detract from your design. I learned this the hard way when I had to redo an entire render because it just looked too busy.
  4. Perspective Matters: The angle at which you present your render can change everything. Use camera settings to find the best angle that showcases your design. Often, standing at eye level works best. You want viewers to feel like they could step right into the space.
  5. Post-Processing Magic: Don’t underestimate the power of post-processing! Using software like Photoshop or Lightroom to adjust brightness, contrast, and saturation can really make your render pop. Just be cautious not to over-edit; you want to keep it looking natural.

By incorporating these tips into your workflow, you’ll be well on your way to creating jaw-dropping, photorealistic interior renders that your clients will love!

Common Mistakes to Avoid in Interior Design Rendering

As with any craft, it’s easy to trip up when you’re just starting out in 3D rendering. Here are some common mistakes I’ve made (and seen others make) that you should definitely avoid:

  1. Ignoring Lighting Effects: Seriously, don’t skip out on lighting! Poor lighting can make even the best designs look flat and lifeless. Always take the time to set up your light sources carefully. I once had a render that looked so dull simply because I didn’t pay attention to how shadows were cast. It was a rookie mistake!
  2. Overuse of Post-Processing: While post-processing can enhance your render, too much editing can lead to an unrealistic outcome. Stick to adjustments that enhance rather than alter your original vision. I’ve seen some renders go from stunning to over-the-top with a few too many filters.
  3. Low-Quality Textures and Materials: Using low-resolution textures can make your render look amateurish. Always invest time in finding quality textures. I learned this lesson when I used a low-res wood texture that completely ruined the look of an otherwise beautiful kitchen render.
  4. Ignoring Client Feedback: This one’s crucial! Make sure to involve your clients in the process and listen to their feedback. It’s easy to get caught up in your vision, but the ultimate goal is to meet their needs. I had a project that went sideways because I didn’t incorporate my client’s suggestions early on.

Avoiding these common pitfalls can significantly enhance the quality of your 3D renders and boost client satisfaction.

The Future of 3D Rendering in Interior Design

As technology advances, the future of 3D rendering in interior design is looking incredibly exciting! Here are some trends to watch for:

  1. AI in 3D Rendering: Artificial intelligence is starting to play a big role in rendering software. Imagine software that learns your preferences and offers suggestions based on your style! This could save tons of time and make the rendering process more intuitive. I can’t wait to see how this unfolds!
  2. Virtual Reality Integration: VR is making waves in the design world. Soon, clients may be able to take virtual walkthroughs of their future spaces, allowing them to experience the design in real time. This will likely change how we present our ideas, giving clients a more immersive experience.
  3. Real-Time Rendering: Real-time rendering is becoming more common, allowing designers to see changes instantly as they adjust their models. This feature can significantly enhance workflow and creativity, making it easier to tweak designs on the fly. I’m all for anything that speeds up the process without sacrificing quality!
  4. Sustainability Considerations: With growing awareness around sustainability, future rendering tools will likely integrate features that help designers choose eco-friendly materials and layouts. This trend is something I fully support as it aligns with the growing need for sustainable design practices.

The future is bright for 3D rendering in interior design, and I’m excited to see how these advancements will shape our industry!

Conclusion

In conclusion, the world of 3D rendering is not just a trend—it’s a fundamental tool that has revolutionized how we approach interior design. From enhancing visuals to improving communication with clients, mastering 3D rendering can elevate your design game to new heights.

As you explore the tips, techniques, and tools outlined in this guide, remember to customize your approach based on your unique style and project needs. Don’t hesitate to experiment with different software and settings; after all, practice makes perfect!

And as you continue your journey, feel free to share your experiences or any tips you’ve picked up along the way in the comments below. Let’s build a community of designers who support and learn from each other. Happy rendering!

Interior Design 3D Rendering Guide: Everything You Need to Know2024-10-07T17:43:31+00:00

The Ultimate Guide to Best 3D Rendering Software for Home Projects in 2025

The Ultimate Guide to Best 3D Rendering Software for Home Projects in 2025

Wow, can you believe it? The first time I walked through a 3D render of my dream home, I nearly fell over! It was like stepping into the future, except the future was right there on my computer screen. That’s the jaw-dropping power of 3D rendering software, folks!

Listen, I’ve been in the architectural visualization game for over 15 years now, and let me tell you, choosing the right 3D rendering software for home projects can make or break your designs. It’s like picking the perfect paintbrush – get it right, and you’re Picasso; get it wrong, and well… let’s just say I’ve had my fair share of “happy little accidents”!

But don’t worry, I’ve got your back. In this guide, we’re gonna dive deep into the world of 3D rendering software for home projects. We’ll look at the cream of the crop, break down what makes them tick, and I’ll even share some hard-earned tips to help you avoid the pitfalls I stumbled into. So, grab a coffee (or a strong tea if that’s your jam), and let’s get this show on the road!

Understanding 3D Rendering Software for Home Projects

Alright, let’s start with the basics. What exactly is 3D rendering software? Well, think of it as a magical toolbox that turns your 2D drawings and ideas into stunning 3D visualizations. It’s like having a genie in a bottle, except instead of three wishes, you get unlimited chances to tweak and perfect your home designs.

Now, when you’re looking for the best 3D rendering software for home projects, there are a few key features you’ll want to keep an eye out for:

  1. User-friendly interface (trust me, you don’t want to spend hours just figuring out how to draw a simple wall)
  2. Realistic lighting and textures (because nobody wants their dream home to look like a video game from the 90s)
  3. A good library of assets (furniture, decor, you name it)
  4. Compatibility with other design software (playing nice with others is important, even in the software world)
  5. Rendering speed (because ain’t nobody got time for renders that take days to complete)

I remember when I first started out, I chose a software based solely on how cool the rendered images looked in the ads. Big mistake! I spent more time fighting with the interface than actually designing. Don’t be like rookie me – consider all these factors before making your choice.

The impact of good rendering software on your projects? It’s huge! With the right tools, you can spot design flaws before a single brick is laid, experiment with different layouts and decor options in a snap, and create presentations that’ll knock your clients’ socks off. I once landed a major project just because my 3D render let the clients virtually ‘walk’ through their future home. They were sold before I even finished my pitch!

Top 5 3D Rendering Software for Home Projects

  1. SketchUp

Ah, SketchUp – my old friend. This was the first 3D software I ever used, and it still holds a special place in my heart.

Key features:

  • Super intuitive interface (seriously, if you can use a pencil, you can use SketchUp)
  • Huge library of free 3D models
  • Great for quick conceptual designs

Pros:

  • Easy to learn, perfect for beginners
  • Lots of free tutorials available
  • Plays well with other software

Cons:

  • Not the best for hyper-realistic renders out of the box
  • Can be a bit clunky for complex designs

Pricing: They’ve got a free version, but the Pro version (which you’ll probably want) starts at $299/year. Not too shabby for what you get!

  1. Lumion

Lumion is like the cool kid on the block when it comes to architectural visualization. I remember the first time I used it – it was like going from a bicycle to a sports car!

Key features:

  • Real-time rendering (no more waiting hours for a single image)
  • Incredible library of assets (trees, people, furniture – you name it)
  • Atmospheric effects that’ll make your jaw drop

Pros:

  • Creates stunningly realistic renders
  • Super fast – great for client presentations
  • Regular updates with new features

Cons:

  • Steep learning curve (but worth it)
  • Can be hardware-intensive (might need to upgrade your computer)

Pricing: Starts at $1499/year. Yeah, it’s not cheap, but for the results you get? Worth every penny in my book.

  1. V-Ray

V-Ray is like the Swiss Army knife of rendering engines. It’s powerful, versatile, and once you master it, there’s almost nothing you can’t do.

Key features:

  • Photorealistic rendering capabilities
  • Advanced lighting options
  • Works as a plugin for many 3D modeling software

Pros:

  • Produces top-notch, professional-quality renders
  • Highly customizable
  • Great for both interiors and exteriors

Cons:

  • Can be overwhelming for beginners
  • Render times can be long (but the results are worth the wait)

Pricing: Varies depending on the package, but expect to pay around $350/year for the basic version.

  1. Blender

Blender is the dark horse of the 3D rendering world. It’s free, open-source, and don’t let that fool you – it’s incredibly powerful.

Key features:

  • Comprehensive 3D creation suite (modeling, rendering, animation, you name it)
  • Cycles render engine for photorealistic results
  • Active community constantly developing new features

Pros:

  • It’s free! (Did I mention that? Because, wow!)
  • Incredibly versatile
  • Great for those who want to dive deep into 3D

Cons:

  • Steep learning curve
  • Interface can be intimidating at first

Pricing: Free! Yep, you read that right. It’s open-source and completely free.

  1. 3ds Max

Last but not least, we have 3ds Max – the heavyweight champion of 3D software. This is what the pros use, folks.

Key features:

  • Advanced modeling tools
  • Powerful rendering capabilities
  • Excellent for complex architectural visualizations

Pros:

  • Industry-standard software
  • Can handle extremely complex projects
  • Great particle and dynamics systems

Cons:

  • Expensive
  • Steep learning curve
  • Can be overkill for simple home projects

Pricing: Subscription starts at $205/month. Ouch, right? But for professional-grade work, it’s often worth the investment.

Factors to Consider When Choosing 3D Rendering Software for Homes

Alright, now that we’ve looked at some of the top dogs in the 3D rendering world, let’s talk about how to choose the right one for you. It’s not just about picking the most expensive or the one with the prettiest interface (learned that the hard way).

    1. Ease of use and learning curve: Be honest with yourself about your skill level. There’s no shame in starting with something simpler and working your way up. I began with SketchUp and gradually moved to more complex software as I grew more comfortable.
    2. Rendering quality and realism: How photorealistic do you need your renders to be? For some projects, a stylized look works great. For others, you need it to look like a photograph. Choose accordingly.
    3. Integration with other design software: This is huge! You don’t want to be stuck recreating models because your rendering software doesn’t play nice with your modeling software.
    4. Hardware requirements: Nothing’s worse than dropping a bunch of cash on software only to realize your computer can’t handle it. Ask me how I know…
    5. Cost and licensing options: Budget is always a factor. Remember, the most expensive option isn’t always the best for your needs.
    6. Community support and resources: Trust me, you’re gonna need help at some point. A strong community and good resources can be a lifesaver.

Tips for Getting Started with 3D Rendering Software

So, you’ve chosen your software. Now what? Well, let me share some tips I wish someone had told me when I was starting out:

  1. Start with tutorials: Seriously, don’t skip this step. I tried to wing it at first and, well, let’s just say my first renders looked more like abstract art than homes.
  2. Practice, practice, practice: Rome wasn’t built in a day, and neither is 3D rendering skill. Start with simple projects and work your way up.
  3. Use asset libraries: Don’t reinvent the wheel. Most software comes with libraries of pre-made assets. Use them!
  4. Optimize your workflow: Find what works for you. Maybe you prefer to model everything first, then texture. Or maybe you like to work room by room. There’s no one right way.
  5. Join online communities: Forums, Reddit, Facebook groups – there are tons of places where you can get advice, share your work, and learn from others.

Future Trends in 3D Rendering Software for Home Projects

Exciting times ahead, folks! The world of 3D rendering is evolving faster than you can say “photorealistic visualization”. Here’s what I’m keeping my eye on:

  1. AI-assisted rendering: Imagine software that can predict what you want to design next. It’s coming, and it’s gonna be a game-changer.
  2. VR and AR integration: We’re talking fully immersive walkthroughs of homes that don’t even exist yet. I recently tried a VR walkthrough of a render I made, and let me tell you, it was mind-blowing!
  3. Cloud-based rendering: Say goodbye to maxing out your computer’s resources. Cloud rendering is getting better and more affordable every day.
  4. Sustainable design features: With the growing focus on eco-friendly homes, expect to see more tools for visualizing and calculating the environmental impact of designs.

Conclusion:

Whew! We’ve covered a lot of ground, haven’t we? From the basics of 3D rendering software to the cutting-edge trends shaping the future of home visualization, we’ve been on quite the journey.

Remember, choosing the right 3D rendering software for your home projects is a personal decision. What works for me might not work for you, and that’s okay! The key is to find the tool that fits your needs, your skills, and yes, your budget.

I encourage you to try out different options. Many of these software packages offer free trials – take advantage of them! Play around, make mistakes (trust me, you will), and find what feels right for you.

And hey, I’d love to hear about your experiences! Have you used any of these software packages? Got any tips or tricks to share? Or maybe you’re just starting out and have questions? Drop a comment below. After all, we’re all in this 3D rendering adventure together!

Now, if you’ll excuse me, I’ve got a client waiting for a virtual tour of their future dream home. Time to fire up the ol’ rendering engine and make some magic happen!

The Ultimate Guide to Best 3D Rendering Software for Home Projects in 20252024-10-07T17:33:47+00:00
Go to Top